Why PCB Cleaning Is Crucial
Cleaning your PCBs is essential for several reasons:
- Improved Performance: Contaminants on a PCB can interfere with electrical signals, leading to decreased performance, signal integrity issues, and even complete failure of the circuit.
- Enhanced Durability: Dirt, dust, and other debris can trap moisture, leading to corrosion and degradation of the PCB over time. Regular cleaning helps prevent these issues and extends the lifespan of your PCBs.
- Better Visual Inspection: A clean PCB allows for easier visual inspection, enabling you to identify any defects, such as solder bridges, cold solder joints, or damaged components.
- Compliance with Standards: Many industries have specific cleanliness requirements for PCBs, such as the IPC-A-610 standard. Maintaining a clean PCB ensures compliance with these standards and helps avoid costly rework or rejections.
Common Contaminants on PCBs
Before we dive into PCB cleaning methods, let’s take a look at some of the most common contaminants found on PCBs:
- Flux Residue: Flux is used during the soldering process to prevent oxidation and improve solder joint quality. However, if not properly cleaned, flux residue can attract moisture and cause corrosion.
- Dust and Debris: PCBs can accumulate dust and debris during manufacturing, handling, and storage. These contaminants can interfere with electrical connections and trap moisture.
- Oils and Greases: Fingerprints, lubricants, and other oils can contaminate PCBs during handling and assembly. These contaminants can degrade the performance of the PCB and attract additional dirt and debris.
- Solder Balls and Splashes: During the soldering process, small solder balls or splashes can occur, which can cause short circuits if not removed.

PCB Cleaning Methods
There are several methods for cleaning PCBs, each with its own advantages and disadvantages. The choice of method depends on factors such as the type of contaminants, the size and complexity of the PCB, and the available resources.
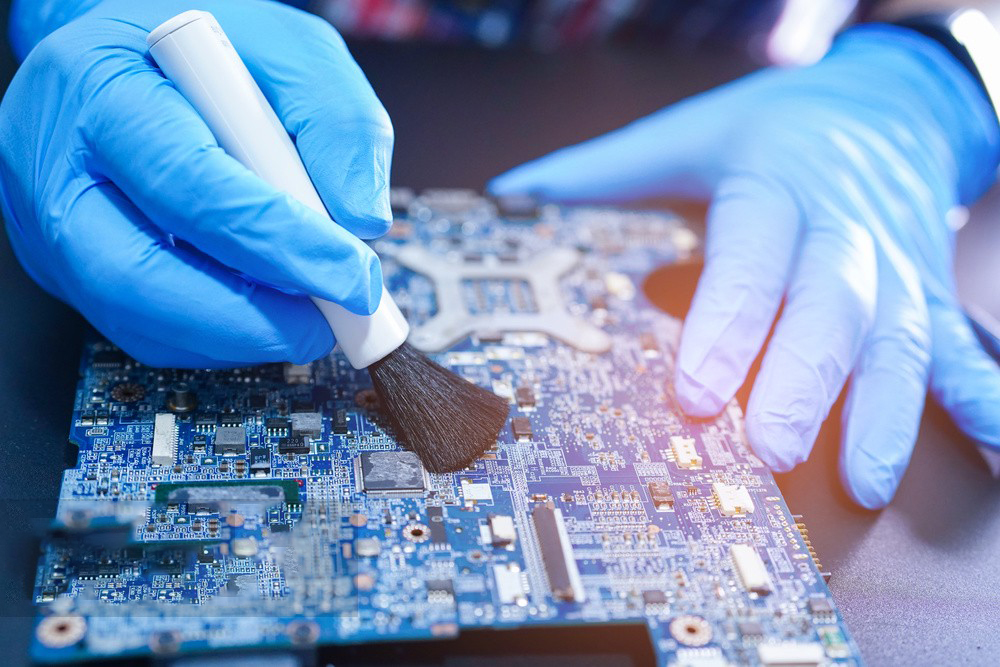
Manual Cleaning
Manual cleaning involves using hand tools, such as brushes, swabs, and wipes, to remove contaminants from the PCB. This method is suitable for small-scale cleaning or when dealing with delicate components.
Tools and Materials:
– Soft-bristled brushes
– Cotton swabs
– Lint-free wipes
– Isopropyl alcohol (IPA) or other suitable solvents
Procedure:
1. Dip the brush, swab, or wipe in the cleaning solvent.
2. Gently scrub the contaminated areas of the PCB, taking care not to damage components.
3. Use a clean wipe or swab to remove any remaining solvent and debris.
4. Allow the PCB to dry completely before further handling or assembly.
Advantages:
– Cost-effective for small-scale cleaning
– Allows for targeted cleaning of specific areas
– Suitable for delicate components
Disadvantages:
– Time-consuming for large or complex PCBs
– Inconsistent results due to human error
– Risk of damaging components with excessive force
Ultrasonic Cleaning
Ultrasonic cleaning uses high-frequency sound waves to agitate a cleaning solution, creating tiny bubbles that implode and release energy, effectively removing contaminants from the PCB surface.
Equipment and Materials:
– Ultrasonic cleaning tank
– Ultrasonic cleaning solution (e.g., water-based or solvent-based)
– Rinse tank with deionized (DI) water
– Drying equipment (e.g., air knife, oven)
Procedure:
1. Fill the ultrasonic cleaning tank with the appropriate cleaning solution.
2. Place the PCB in a basket or fixture and immerse it in the cleaning solution.
3. Run the ultrasonic cleaning cycle for the recommended duration (typically 5-15 minutes).
4. Remove the PCB from the cleaning solution and rinse it thoroughly in the DI water tank.
5. Dry the PCB using an air knife or oven to remove any remaining moisture.
Advantages:
– Effective removal of tough contaminants
– Uniform cleaning of the entire PCB surface
– Automated process, reducing human error
Disadvantages:
– Higher initial equipment cost
– Risk of damage to sensitive components due to high-frequency vibrations
– Requires post-cleaning rinsing and drying steps
Spray Cleaning
Spray cleaning involves using pressurized sprays of cleaning solutions to remove contaminants from the PCB surface. This method is suitable for larger PCBs and can be automated for higher throughput.
Equipment and Materials:
– Spray cleaning machine
– Cleaning solution (e.g., water-based or solvent-based)
– Rinse tank with DI water
– Drying equipment (e.g., air knife, oven)
Procedure:
1. Load the PCB into the spray cleaning machine.
2. Apply the cleaning solution using pressurized sprays, ensuring complete coverage of the PCB surface.
3. Rinse the PCB thoroughly with DI water sprays to remove any remaining cleaning solution and contaminants.
4. Dry the PCB using an air knife or oven to remove any remaining moisture.
Advantages:
– Efficient cleaning of larger PCBs
– Automated process, reducing human error
– Adjustable spray pressure for different cleaning requirements
Disadvantages:
– Higher initial equipment cost
– Risk of damage to sensitive components due to high-pressure sprays
– Requires post-cleaning rinsing and drying steps
Vapor Degreasing
Vapor degreasing is a cleaning method that uses the vapors of a solvent to remove contaminants from the PCB surface. The PCB is exposed to the solvent vapors, which condense on the surface, dissolving and removing the contaminants.
Equipment and Materials:
– Vapor degreasing machine
– Solvent (e.g., perchloroethylene, trichloroethylene)
Procedure:
1. Load the PCB into the vapor degreasing machine.
2. Heat the solvent to its boiling point, creating a vapor zone above the liquid solvent.
3. Lower the PCB into the vapor zone, allowing the solvent vapors to condense on the surface and dissolve contaminants.
4. Raise the PCB out of the vapor zone, allowing the solvent to evaporate and leaving a clean surface.
Advantages:
– Effective removal of oils, greases, and other organic contaminants
– No need for post-cleaning rinsing or drying steps
– Automated process, reducing human error
Disadvantages:
– Higher initial equipment cost
– Limited compatibility with certain plastics and components
– Environmental and health concerns associated with solvent use

Choosing the Right Cleaning Solution
Selecting the appropriate cleaning solution is crucial for effective PCB cleaning. The choice depends on the type of contaminants, the components on the PCB, and the cleaning method employed.
Water-based Solutions
Water-based cleaning solutions are environmentally friendly and suitable for removing polar contaminants, such as flux residues and salts. They are typically used in ultrasonic and spray cleaning methods.
Advantages:
– Environmentally friendly
– Safe for most components
– Cost-effective
Disadvantages:
– Less effective on non-polar contaminants (oils, greases)
– May require additional surfactants or detergents for improved cleaning performance
Solvent-based Solutions
Solvent-based cleaning solutions are effective in removing non-polar contaminants, such as oils, greases, and some types of flux residue. They are commonly used in ultrasonic, spray, and vapor degreasing methods.
Advantages:
– Effective on a wide range of contaminants
– Fast evaporation, reducing drying time
Disadvantages:
– Flammable and may pose health risks
– Can damage certain plastics and components
– Environmental concerns and disposal requirements
When selecting a cleaning solution, always consult the manufacturer’s recommendations and safety data sheets (SDS) to ensure compatibility with your PCB Components and compliance with local regulations.
PCB Cleaning Best Practices
To achieve optimal results and maintain the integrity of your PCBs, follow these best practices:
- Clean PCBs promptly: Clean your PCBs as soon as possible after manufacturing or assembly to prevent contaminants from hardening or corroding the surface.
- Use the appropriate cleaning method: Choose the cleaning method that best suits your PCB size, complexity, and contaminant type.
- Select compatible cleaning solutions: Ensure that the cleaning solution is compatible with your PCB components and does not cause damage or degradation.
- Follow manufacturer guidelines: Adhere to the manufacturer’s recommended procedures, concentrations, and exposure times for cleaning solutions and equipment.
- Proper rinsing and drying: Thoroughly rinse PCBs after cleaning to remove any remaining contaminants and cleaning solution. Dry the PCBs completely to prevent moisture-related issues.
- Handle PCBs with care: Use clean, lint-free gloves when handling PCBs to avoid recontamination and always store PCBs in a clean, dry environment.
- Regularly maintain cleaning equipment: Clean and maintain your cleaning equipment according to the manufacturer’s guidelines to ensure consistent performance and prevent cross-contamination.
Frequently Asked Questions (FAQ)
- How often should I clean my PCBs?
It is recommended to clean your PCBs immediately after manufacturing or assembly, and then periodically as needed based on the environment and application. If your PCBs are exposed to harsh conditions or contaminants, more frequent cleaning may be necessary. - Can I use household cleaners to clean my PCBs?
No, it is not advisable to use household cleaners on PCBs. These cleaners may contain chemicals that can damage components or leave residues that attract moisture and cause corrosion. Always use cleaning solutions specifically designed for PCB cleaning. - How do I know if my PCB is clean enough?
Visual inspection is the first step in assessing PCB Cleanliness. A clean PCB should be free of visible contaminants, flux residue, and solder balls. For more stringent cleanliness requirements, you can use analytical methods such as ionic contamination testing or surface insulation resistance (SIR) testing. - Can I reuse cleaning solutions?
It depends on the type of cleaning solution and the level of contamination. Some cleaning solutions can be reused for multiple cleaning cycles, while others should be disposed of after each use. Always follow the manufacturer’s recommendations for the safe and effective use of cleaning solutions. - How do I dispose of used cleaning solutions?
The disposal of used cleaning solutions is subject to local environmental regulations. Consult your local authorities for guidance on the proper disposal methods for your specific cleaning solution. In general, used cleaning solutions should be collected, stored, and disposed of through authorized waste management facilities.
Conclusion
Keeping your PCBs clean is essential for maintaining their performance, durability, and reliability. By understanding the common contaminants, selecting the appropriate cleaning method and solution, and following best practices, you can effectively clean your PCBs and extend their lifespan.
Remember to always prioritize safety and environmental responsibility when handling cleaning solutions and disposing of waste. With a well-planned and executed PCB cleaning process, you can ensure that your electronic devices function optimally and stand the test of time.
No responses yet