Introduction
When it comes to creating a new electronic device, having a prototype is crucial. A prototype allows you to test your design, make necessary adjustments, and ensure that your final product meets your exact needs. However, creating a prototype can be a daunting task, especially if you’re new to PCB (Printed Circuit Board) prototyping. In this article, we’ll explore ten ways to make a prototype for your exact needs, as told by a PCB maker.
Understanding PCB Prototyping
What is PCB Prototyping?
PCB prototyping is the process of creating a preliminary version of a printed circuit board. This prototype is used to test the functionality, performance, and reliability of the circuit design before mass production. PCB prototyping allows designers to identify and fix any issues with the circuit design, ensuring that the final product meets the desired specifications.
Why is PCB Prototyping Important?
PCB prototyping is essential for several reasons:
- It allows designers to test the functionality of the circuit design.
- It helps identify any design flaws or issues before mass production.
- It enables designers to make necessary adjustments to the circuit design.
- It provides an opportunity to test the performance and reliability of the circuit.
- It helps reduce the overall cost of production by identifying issues early in the design process.

10 Ways to Make a Prototype for Your Exact Needs
1. Define Your Requirements
Before you start creating your prototype, it’s essential to define your requirements. This includes identifying the purpose of your device, the features it should have, and the components it will require. By clearly defining your requirements, you can ensure that your prototype meets your exact needs.
2. Choose the Right PCB Design Software
Choosing the right PCB design software is crucial for creating a successful prototype. There are several PCB design software options available, each with its own set of features and capabilities. Some popular PCB design software options include:
| Software | Features |
|---|---|
| Altium Designer | Comprehensive PCB design and simulation capabilities |
| Eagle | User-friendly interface and extensive library of components |
| KiCad | Open-source software with a wide range of features |
| OrCAD | Powerful schematic capture and simulation capabilities |
When choosing PCB design software, consider factors such as ease of use, compatibility with your operating system, and the availability of component libraries.
3. Select the Appropriate Components
Selecting the appropriate components is essential for creating a functional prototype. When choosing components, consider factors such as:
- Compatibility with your circuit design
- Power requirements
- Size and form factor
- Cost and availability
It’s also important to choose components that are readily available and easy to source, as this can help reduce the overall cost and lead time of your prototype.
4. Create a Schematic Diagram
A schematic diagram is a visual representation of your circuit design. It shows how the components are connected and how the circuit functions. Creating a schematic diagram is an essential step in the PCB prototyping process, as it helps you identify any issues with your circuit design before you start creating the physical prototype.
5. Design the PCB Layout
Once you have a schematic diagram, the next step is to design the PCB layout. The PCB layout determines the physical placement of the components on the board and the routing of the traces that connect them. When designing the PCB layout, consider factors such as:
- Component placement and orientation
- Trace width and spacing
- Ground planes and power planes
- Signal integrity and EMI (Electromagnetic Interference) considerations
6. Use a PCB Prototyping Service
Using a PCB prototyping service can help streamline the prototyping process and ensure that your prototype meets your exact specifications. PCB prototyping services offer a range of options, including:
- Quick-turn prototyping
- High-quality PCB fabrication
- Assembly services
- Testing and inspection services
When choosing a PCB prototyping service, consider factors such as turnaround time, cost, and quality of service.
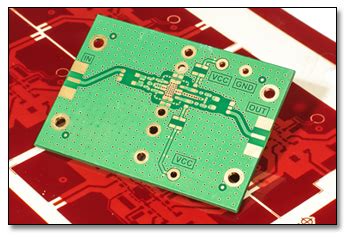
7. Assemble the Prototype
Once you have the PCB fabricated, the next step is to assemble the components onto the board. This can be done manually or using automated assembly equipment, depending on the complexity of your design and the number of prototypes you need.
When assembling the prototype, it’s important to follow best practices such as:
- Using the correct soldering techniques
- Ensuring proper component placement and orientation
- Testing the functionality of each component before final assembly
8. Test and Debug the Prototype
Testing and debugging the prototype is an essential step in the PCB prototyping process. This involves verifying that the prototype functions as intended and identifying any issues or bugs that need to be addressed.
When testing and debugging the prototype, consider factors such as:
- Power consumption and efficiency
- Signal integrity and noise levels
- Functionality and performance of each component
- Overall system functionality and reliability
9. Iterate and Refine the Design
Based on the results of your testing and debugging, you may need to iterate and refine your design. This may involve making changes to the schematic diagram, PCB layout, or component selection.
It’s important to document any changes made during the iteration process and to maintain version control of your design files. This can help ensure that you have a clear record of the changes made and can easily revert to a previous version if needed.
10. Validate the Final Prototype
Once you have iterated and refined your design, the final step is to validate the prototype. This involves testing the prototype under real-world conditions to ensure that it meets your exact needs and specifications.
When validating the prototype, consider factors such as:
- Environmental conditions (temperature, humidity, vibration, etc.)
- Long-term reliability and durability
- Compliance with relevant standards and regulations
- User experience and usability

Frequently Asked Questions (FAQ)
1. How long does it take to create a PCB Prototype?
The time it takes to create a PCB prototype can vary depending on the complexity of your design and the PCB prototyping service you use. Quick-turn prototyping services can often produce a prototype within 24-48 hours, while more complex designs may take several weeks.
2. How much does it cost to create a PCB prototype?
The cost of creating a PCB prototype can vary depending on factors such as the size and complexity of your design, the number of layers, and the components used. PCB prototyping services typically charge based on the size of the board and the number of layers, with additional costs for components and assembly services.
3. Can I create a PCB prototype at home?
Yes, it is possible to create a PCB prototype at home using a variety of methods, such as etching, milling, or using a PCB printer. However, these methods can be time-consuming and may not produce the same level of quality as a professional PCB prototyping service.
4. What are some common mistakes to avoid when creating a PCB prototype?
Some common mistakes to avoid when creating a PCB prototype include:
- Not properly defining your requirements
- Choosing the wrong components or PCB design software
- Not considering signal integrity or EMI issues
- Not thoroughly testing and debugging the prototype
- Not documenting changes made during the iteration process
5. How do I choose the right PCB prototyping service?
When choosing a PCB prototyping service, consider factors such as:
- Turnaround time and cost
- Quality of service and customer support
- Capabilities and expertise in your specific industry or application
- Reputation and customer reviews
It’s also a good idea to request quotes from multiple services and compare their offerings to find the best fit for your needs and budget.

Conclusion
Creating a prototype for your exact needs is an essential step in the development of any electronic device. By following the ten ways outlined in this article, you can streamline the PCB prototyping process and ensure that your prototype meets your exact specifications.
Remember to define your requirements, choose the right components and PCB design software, and thoroughly test and debug your prototype. By iterating and refining your design based on the results of your testing, you can create a final prototype that meets your exact needs and is ready for mass production.
If you have any further questions or need assistance with your PCB prototyping project, don’t hesitate to reach out to a professional PCB maker for guidance and support.
No responses yet