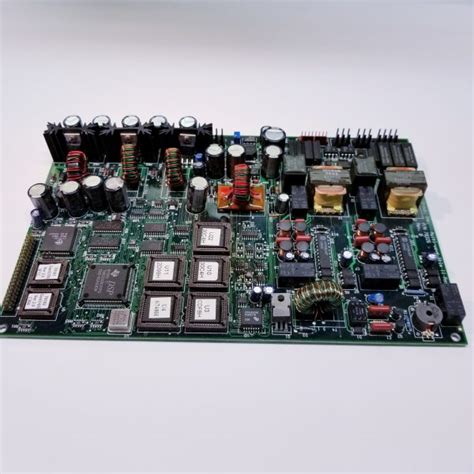
Introduction to PCB Legend
A PCB (Printed Circuit Board) legend, also known as silkscreen or overlay, is a layer of text and symbols printed on the surface of a PCB. The primary purpose of the PCB legend is to provide essential information about the board’s components, their placement, and the overall functionality of the circuit. The legend helps engineers, technicians, and manufacturers to identify and troubleshoot the PCB during assembly, testing, and maintenance processes.
Importance of PCB Legend
The PCB legend is a crucial element in the design and manufacturing of printed circuit boards for several reasons:
- Component identification: The legend clearly labels each component on the board, making it easier for technicians to locate and identify them during assembly and troubleshooting.
- Orientation guidance: The legend often includes polarity markers, pin numbers, and other orientation information to ensure correct component placement and soldering.
- Testing and debugging: Clear labeling of test points, connectors, and switches on the legend facilitates efficient testing and debugging of the PCB.
- Branding and certification: The legend can include company logos, part numbers, and certification marks, which are important for branding and meeting industry standards.
Elements of a PCB Legend
A comprehensive PCB legend consists of various elements that provide essential information about the board and its components. Some of the key elements include:
Component Designators
Component designators are alphanumeric codes used to identify each component on the PCB. These codes typically consist of a letter prefix followed by a number, such as R1 for a resistor, C2 for a capacitor, or U3 for an integrated circuit. The legend prints these designators next to their corresponding components, making it easy to locate and reference them in the schematic diagram and bill of materials (BOM).
Polarity Markers
Polarity markers indicate the orientation of polarized components, such as electrolytic capacitors, diodes, and LEDs. These markers usually appear as small ‘+’ signs or circles with a flat edge, ensuring that the components are placed correctly during assembly to avoid damage or malfunction.
Pin Numbers
For components with multiple pins, such as integrated circuits and connectors, the legend often includes pin numbers next to each pad. This information helps in correctly orienting the component and identifying specific pins during soldering, testing, and debugging.
Test Points
Test points are labeled on the PCB legend to facilitate testing and debugging of the circuit. These points are typically marked with “TP” followed by a number, such as TP1 or TP2. Test points provide convenient access to critical signals or voltages in the circuit, allowing technicians to check the board’s functionality using probes or test equipment.
Connector Pinouts
For boards with external connectors, the legend usually includes pinout information next to each connector. This information specifies the function of each pin, such as power, ground, or specific signal names. Clear connector pinout labeling is essential for proper wiring and interfacing with other devices or systems.
Switches and Jumpers
The legend also labels switches and jumpers on the PCB, indicating their functions and positions. For example, a switch might be labeled “SW1” with positions “ON” and “OFF,” while a jumper might be labeled “JP1” with positions “1-2” and “2-3.” This information helps users configure the board correctly for specific applications or troubleshooting purposes.
Company Logos and Part Numbers
PCB legends often include company logos and part numbers for branding and identification purposes. The logo helps to establish brand recognition and can be useful for marketing and promotional efforts. The part number is essential for inventory management, reordering, and tracking revisions of the PCB.
Certification Marks
Depending on the intended application and market, a PCB may require certain certification marks to be printed on the legend. These marks indicate compliance with industry standards, such as UL (Underwriters Laboratories), CE (Conformité Européenne), or RoHS (Restriction of Hazardous Substances). Including certification marks on the legend ensures that the board meets the necessary safety and environmental requirements.

PCB Legend Design Considerations
When designing a PCB legend, there are several factors to consider to ensure optimal readability, clarity, and manufacturing feasibility:
Font and Character Size
Choosing the appropriate font and character size is crucial for legibility. The legend should use a clean, sans-serif font that is easy to read even at small sizes. The minimum character size depends on the manufacturing capabilities and the available space on the PCB, but a common guideline is to use a minimum height of 1.5 mm (0.06 inches) for main labels and 1 mm (0.04 inches) for secondary information.
Color and Contrast
The legend color should provide sufficient contrast against the PCB substrate to ensure readability. White is the most common legend color, as it offers good visibility on green, black, or blue PCB substrates. However, other colors like yellow or black can be used depending on the design requirements and aesthetic preferences. It is essential to consider the lighting conditions under which the PCB will be used, as certain colors may be more visible in specific environments.
Placement and Spacing
Proper placement and spacing of legend elements are essential for clarity and manufacturing feasibility. The legend should be positioned close to the corresponding components without overlapping pads, traces, or other critical features. Sufficient spacing between legend elements helps prevent confusion and ensures that the labels remain legible even if there are slight variations in the printing process.
Manufacturing Constraints
PCB legend design must take into account the manufacturing capabilities and constraints of the PCB fabrication process. The legend is typically printed using silkscreen or ink-jet printing methods, which have limitations in terms of minimum line width, spacing, and registration accuracy. Consulting with the PCB manufacturer early in the design process can help ensure that the legend design is compatible with their production capabilities and avoids potential issues during fabrication.

PCB Legend Creation Process
Creating a PCB legend involves several steps, from design to manufacturing:
Legend Design in EDA Software
PCB legends are typically designed using Electronic Design Automation (EDA) software, such as Altium Designer, KiCad, or Eagle. These software tools provide dedicated layers for creating the legend artwork, allowing designers to place text, symbols, and graphics on the PCB layout. The legend design process involves adding component designators, polarity markers, pin numbers, and other necessary information, as well as ensuring proper placement and spacing of the elements.
Exporting Legend Artwork
Once the legend design is complete, the artwork must be exported in a format compatible with the PCB manufacturing process. The most common file format for PCB legend artwork is Gerber, which is a standard used by the PCB industry. The EDA software generates separate Gerber files for each layer of the PCB, including the legend layer, which contains the text and symbols to be printed on the board.
Legend Printing
The PCB manufacturer receives the Gerber files and uses them to create the physical PCB. The legend is typically printed using silkscreen or ink-jet printing methods, depending on the manufacturer’s capabilities and the design requirements. Silkscreen printing involves applying a stencil to the PCB surface and forcing ink through the openings to create the legend artwork. Ink-jet printing, on the other hand, uses a digital printer to deposit ink directly onto the PCB surface, allowing for finer detail and more complex designs.
Quality Control and Inspection
After the legend is printed, the PCB undergoes a quality control and inspection process to ensure that the artwork is accurate, legible, and free of defects. This process may involve automated optical inspection (AOI) systems, which use cameras and image processing algorithms to detect any errors or inconsistencies in the legend. Manual inspection by trained technicians may also be performed to verify the legend quality and catch any issues that the automated systems might miss.
Benefits of a Well-Designed PCB Legend
A well-designed PCB legend offers several benefits throughout the life cycle of the product:
- Improved assembly efficiency: Clear and accurate labeling of components, polarity markers, and pin numbers on the legend helps streamline the assembly process, reducing the risk of errors and increasing overall productivity.
- Enhanced troubleshooting and maintenance: A detailed legend makes it easier for technicians to identify components, trace signals, and diagnose issues during troubleshooting and maintenance tasks, ultimately reducing downtime and repair costs.
- Better collaboration and communication: A comprehensive legend serves as a visual reference for engineers, designers, and manufacturers, facilitating better communication and collaboration among team members throughout the product development process.
- Increased customer satisfaction: A well-labeled PCB demonstrates attention to detail and professionalism, which can help establish trust and credibility with customers, particularly in industries where reliability and quality are paramount.
- Compliance with industry standards: Including required certification marks and following industry guidelines for legend design ensures that the PCB meets the necessary safety, environmental, and performance standards, reducing the risk of non-compliance issues and potential liabilities.
Conclusion
The PCB legend is a vital element in the design, manufacturing, and maintenance of printed circuit boards. It provides essential information about the board’s components, their placement, and the overall functionality of the circuit, enabling engineers, technicians, and manufacturers to work more efficiently and effectively. By understanding the importance of the PCB legend, its key elements, and design considerations, you can create a comprehensive and user-friendly legend that enhances the quality and reliability of your PCB projects.
Frequently Asked Questions (FAQ)
- What is the purpose of a PCB legend?
A PCB legend provides essential information about the board’s components, their placement, and the overall functionality of the circuit, helping engineers, technicians, and manufacturers to identify and troubleshoot the PCB during assembly, testing, and maintenance processes. - What are the key elements of a PCB legend?
The key elements of a PCB legend include component designators, polarity markers, pin numbers, test points, connector pinouts, switches and jumpers, company logos and part numbers, and certification marks. - What are the common methods for printing PCB legends?
The most common methods for printing PCB legends are silkscreen printing and ink-jet printing. Silkscreen printing involves applying a stencil to the PCB surface and forcing ink through the openings, while ink-jet printing uses a digital printer to deposit ink directly onto the PCB surface. - What are the benefits of a well-designed PCB legend?
A well-designed PCB legend offers benefits such as improved assembly efficiency, enhanced troubleshooting and maintenance, better collaboration and communication, increased customer satisfaction, and compliance with industry standards. - What are the minimum recommended character sizes for PCB legends?
A common guideline for PCB legend character sizes is to use a minimum height of 1.5 mm (0.06 inches) for main labels and 1 mm (0.04 inches) for secondary information, although the actual minimum size may depend on the manufacturing capabilities and available space on the PCB.
No responses yet