Introduction to SMT Stencils
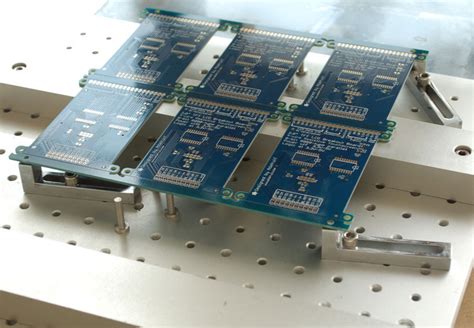
Surface Mount Technology (SMT) stencils are essential tools in the printed circuit board (PCB) assembly process. They are used to apply solder paste onto the PCB pads, ensuring precise and consistent placement of components. SMT stencils come in various types, including framed, frameless, and step-up stencils, each with its own unique characteristics and advantages.
What are SMT Stencils?
SMT stencils are thin, flat sheets of metal, typically made from stainless steel or nickel, with laser-cut openings that correspond to the pads on a PCB. These openings allow for the precise application of solder paste onto the PCB pads, which is crucial for the successful placement and soldering of surface mount components.
The Role of SMT Stencils in PCB Assembly
In the PCB assembly process, SMT stencils play a critical role in ensuring the accuracy and consistency of solder paste application. The stencil is placed on top of the PCB, and solder paste is applied using a squeegee or automated solder paste printer. The solder paste is forced through the openings in the stencil, depositing the correct amount of paste onto the PCB pads.
Types of SMT Stencils
There are three main types of SMT stencils used in PCB assembly: framed, frameless, and step-up stencils. Each type has its own unique features and benefits, making them suitable for different applications and production requirements.
Framed SMT Stencils
Framed SMT stencils are the most common type of stencil used in PCB assembly. They consist of a thin, laser-cut metal sheet that is mounted onto a rigid aluminum frame. The frame provides stability and makes the stencil easier to handle during the solder paste application process.
Advantages of Framed SMT Stencils
- Durability: The aluminum frame protects the stencil from damage during handling and storage, increasing its lifespan.
- Ease of use: The frame makes the stencil easier to align and secure on the PCB, reducing the risk of misalignment and ensuring consistent solder paste application.
- Compatibility: Framed stencils are compatible with most solder paste printers and can be easily integrated into existing production lines.
Disadvantages of Framed SMT Stencils
- Cost: Framed stencils are generally more expensive than frameless stencils due to the additional cost of the aluminum frame.
- Weight: The aluminum frame adds weight to the stencil, which can be a disadvantage in some applications where lightweight stencils are preferred.
Frameless SMT Stencils
Frameless SMT stencils, also known as foil stencils, are thin metal sheets without a supporting frame. They are typically made from stainless steel or nickel and are laser-cut to create the openings for solder paste application.
Advantages of Frameless SMT Stencils
- Cost-effective: Frameless stencils are generally less expensive than framed stencils, as they do not require the additional cost of an aluminum frame.
- Lightweight: Without the added weight of a frame, frameless stencils are lighter and easier to handle, making them suitable for manual solder paste application processes.
- Flexibility: Frameless stencils can be easily cut and shaped to fit unique PCB Designs or to accommodate special components.
Disadvantages of Frameless SMT Stencils
- Durability: Without the protection of a frame, frameless stencils are more susceptible to damage during handling and storage.
- Alignment challenges: Frameless stencils can be more difficult to align and secure on the PCB, which may lead to inconsistencies in solder paste application.
Step-Up SMT Stencils
Step-up SMT stencils, also known as multi-level or 3D stencils, are designed to accommodate PCBs with components of varying heights. These stencils feature different thicknesses or steps that correspond to the different component heights on the PCB.
Advantages of Step-Up SMT Stencils
- Accommodates varying component heights: Step-up stencils allow for the precise application of solder paste on PCBs with components of different heights, ensuring optimal solder joint formation.
- Reduces component damage: By accommodating varying component heights, step-up stencils reduce the risk of damage to taller components during the solder paste application process.
- Improves solder joint quality: Step-up stencils promote the formation of consistent and reliable solder joints, enhancing the overall quality of the assembLED PCB.
Disadvantages of Step-Up SMT Stencils
- Cost: Step-up stencils are generally more expensive than standard framed or frameless stencils due to their complex design and manufacturing process.
- Design complexity: Creating a step-up stencil requires careful consideration of component heights and PCB layout, which can be time-consuming and challenging.

Choosing the Right SMT Stencil
When selecting an SMT stencil for your PCB assembly process, there are several factors to consider to ensure optimal performance and results.
Factors to Consider
- PCB design: The complexity of your PCB design, including the number and size of components, pad dimensions, and component heights, will influence the type of stencil best suited for your application.
- Production volume: Consider your production volume when choosing between framed, frameless, or step-up stencils. Framed stencils are often preferred for high-volume production, while frameless stencils may be more suitable for smaller runs or prototyping.
- Budget: The cost of the stencil is an important consideration, especially for smaller businesses or those with limited budgets. Frameless stencils are generally the most cost-effective option, while step-up stencils are the most expensive.
- Equipment compatibility: Ensure that the chosen stencil type is compatible with your solder paste application equipment, such as solder paste printers or manual squeegees.
Stencil Thickness and Aperture Design
In addition to choosing the right type of SMT stencil, it is crucial to select the appropriate stencil thickness and aperture design for your PCB.
Stencil Thickness
The thickness of the stencil determines the amount of solder paste deposited onto the PCB pads. Thicker stencils deposit more solder paste, while thinner stencils deposit less. The optimal stencil thickness depends on factors such as the size of the PCB pads, the pitch of the components, and the desired solder joint profile.
Common stencil thicknesses include:
| Thickness (mm) | Thickness (mils) | Typical Applications |
|---|---|---|
| 0.100 | 4 | Very fine pitch components (0.3 mm pitch or less) |
| 0.127 | 5 | Fine pitch components (0.4 mm to 0.5 mm pitch) |
| 0.150 | 6 | Standard SMT components (0.5 mm pitch or greater) |
| 0.200 | 8 | Larger SMT components or through-hole components |
Aperture Design
The aperture design of the SMT stencil refers to the size, shape, and orientation of the openings that allow solder paste to be deposited onto the PCB pads. Proper aperture design is essential for achieving consistent solder paste deposits and high-quality solder joints.
Factors to consider when designing stencil apertures include:
- Aperture size: The size of the aperture should be slightly larger than the PCB pad to allow for proper solder paste release. A common rule of thumb is to make the aperture 10% to 20% larger than the pad size.
- Aperture shape: The shape of the aperture can affect the release of solder paste and the formation of solder joints. Common aperture shapes include square, rectangular, and circular.
- Aperture orientation: The orientation of the aperture should match the orientation of the PCB pad to ensure proper alignment and solder paste deposition.

Stencil Maintenance and Cleaning
To ensure consistent performance and long-lasting results, it is important to properly maintain and clean your SMT stencils.
Stencil Handling and Storage
Proper handling and storage of your SMT stencils can help prevent damage and extend their lifespan. Some best practices include:
- Handling with care: Always handle stencils with clean, gloved hands to avoid contamination and minimize the risk of damage.
- Storing in a protective container: Store stencils in a clean, dry container when not in use to protect them from dust, debris, and potential damage.
- Avoiding extreme temperatures: Store stencils in a temperature-controlled environment, as extreme temperatures can cause warping or other damage.
Stencil Cleaning
Regular cleaning of your SMT stencils is essential for maintaining their performance and ensuring consistent solder paste application. There are two main methods for cleaning stencils: manual cleaning and automated cleaning.
Manual Cleaning
Manual cleaning involves using solvents and wiping materials to remove solder paste residue and other contaminants from the stencil surface. Steps for manual cleaning include:
- Applying solvent: Apply a stencil cleaning solvent to the stencil surface, focusing on areas with solder paste residue.
- Wiping the stencil: Use a lint-free wipe or paper towel to gently remove the solder paste residue and solvent from the stencil surface.
- Drying the stencil: Allow the stencil to air dry or use a clean, dry wipe to remove any remaining solvent.
Automated Cleaning
Automated stencil cleaning systems are designed to efficiently clean stencils using a combination of solvents, brushes, and air knives. These systems offer several advantages over manual cleaning, including:
- Consistency: Automated systems provide consistent cleaning results, reducing the risk of human error.
- Time savings: Automated cleaning is faster than manual cleaning, allowing for increased production throughput.
- Improved cleanliness: Automated systems can achieve a higher level of cleanliness compared to manual methods.

Frequently Asked Questions (FAQ)
- What is the difference between framed and frameless SMT stencils?
Framed SMT stencils have a rigid aluminum frame that provides stability and ease of handling, while frameless stencils are thin metal sheets without a supporting frame. Framed stencils are more durable and easier to align, while frameless stencils are more cost-effective and lightweight.
- When should I use a step-up SMT stencil?
Step-up SMT stencils are used when a PCB has components of varying heights. These stencils have different thicknesses or steps that correspond to the different component heights, allowing for precise solder paste application and reducing the risk of component damage.
- How do I choose the right stencil thickness for my PCB?
The optimal stencil thickness depends on factors such as the size of the PCB pads, the pitch of the components, and the desired solder joint profile. Thinner stencils (0.100 mm to 0.127 mm) are suitable for very fine pitch components, while thicker stencils (0.150 mm to 0.200 mm) are used for standard SMT components or through-hole components.
- How often should I clean my SMT stencil?
The frequency of stencil cleaning depends on factors such as the type of solder paste used, the volume of production, and the environmental conditions. As a general rule, stencils should be cleaned every 4 to 8 hours of continuous use or whenever a noticeable buildup of solder paste residue occurs.
- Can I reuse my SMT stencil for different PCB designs?
While it is possible to reuse an SMT stencil for different PCB designs, it is not recommended. Each stencil is custom-made for a specific PCB design, and using a stencil with a different design can lead to inconsistencies in solder paste application and poor solder joint quality. It is best to use a new stencil for each unique PCB design.
Conclusion
SMT stencils are critical components in the PCB assembly process, ensuring precise and consistent solder paste application for the successful placement and soldering of surface mount components. Framed, frameless, and step-up stencils offer unique advantages and are suitable for different applications and production requirements.
When selecting an SMT stencil, it is important to consider factors such as PCB design, production volume, budget, and equipment compatibility. Additionally, choosing the appropriate stencil thickness and aperture design is crucial for achieving optimal solder paste deposition and high-quality solder joints.
Regular maintenance and cleaning of SMT stencils, whether done manually or using automated systems, are essential for maintaining their performance and extending their lifespan. By understanding the different types of SMT stencils, their advantages, and best practices for use and maintenance, you can ensure the success of your PCB assembly process and produce high-quality, reliable electronic products.
No responses yet