Introduction to SMT Stencils and Laser-SMT-Stencils
Surface Mount Technology (SMT) has revolutionized the electronics manufacturing industry by enabling the production of smaller, more compact, and more efficient electronic devices. One of the key components in the SMT Assembly process is the stencil, which is used to apply solder paste onto the printed circuit board (PCB) before the placement of electronic components. In this article, we will explore the various aspects of SMT stencils, with a particular focus on Laser-SMT-Stencils.
What is an SMT Stencil?
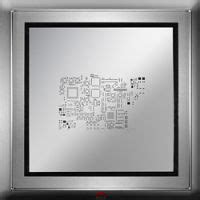
An SMT stencil is a thin sheet of metal, typically stainless steel, with apertures or openings that correspond to the pads on a PCB. The stencil is placed over the PCB, and solder paste is applied using a squeegee or automated solder paste printer. The solder paste is forced through the openings in the stencil, depositing it onto the pads of the PCB. After the stencil is removed, the PCB is ready for component placement.
Types of SMT Stencils
There are several types of SMT stencils available, each with its own advantages and disadvantages. The most common types include:
- Laser-Cut Stencils: These stencils are created using a high-precision laser cutting process, resulting in clean, burr-free apertures with tight tolerances.
- Chemical-etched stencils: These stencils are produced by chemically etching the desired pattern into a sheet of stainless steel. While less precise than laser-cut stencils, they are more economical for larger apertures and lower-volume production.
- Electroformed stencils: These stencils are created by electroplating nickel onto a photoresist-patterned substrate. They offer excellent detail and accuracy but are more expensive than other stencil types.
Advantages of Laser-SMT-Stencils
Laser-SMT-Stencils have gained popularity in recent years due to their numerous advantages over other stencil types. Some of the key benefits include:
High Precision and Accuracy
Laser cutting technology allows for the creation of extremely precise and accurate apertures, with tolerances as tight as ±0.001 inches (0.025 mm). This level of precision is essential for modern electronics manufacturing, where component sizes continue to shrink and pin pitches become increasingly fine.
Clean, Burr-Free Apertures
The laser cutting process produces clean, burr-free apertures, which is crucial for ensuring consistent solder paste deposition. Burrs or rough edges can cause inconsistent paste release, leading to defects such as insufficient or excessive solder joints.
Rapid Prototyping and Quick Turnaround
Laser-SMT-Stencils can be produced quickly, often within 24-48 hours, making them ideal for rapid prototyping and short production runs. This quick turnaround time allows manufacturers to respond to design changes and market demands more efficiently.
Durability and Long Life
Laser-cut stencils are typically made from high-quality stainless steel, which offers excellent durability and long life. With proper care and maintenance, a laser-cut stencil can last for thousands of print cycles, reducing the need for frequent stencil replacements.

Stencil Design Considerations
To ensure optimal performance and solder paste deposition, several factors must be considered when designing an SMT stencil.
Aperture Size and Shape
The size and shape of the apertures in the stencil must be carefully designed to match the pads on the PCB. Aperture size is typically determined by the component’s pin pitch and the desired solder paste volume. Common aperture shapes include rectangles, squares, and circles, although more complex shapes may be required for specific components or layouts.
Stencil Thickness
Stencil thickness plays a crucial role in determining the volume of solder paste deposited onto the PCB. Thicker stencils deposit more paste, while thinner stencils deposit less. The optimal stencil thickness depends on factors such as component size, pin pitch, and the desired solder joint profile. Common stencil thicknesses range from 0.004 inches (0.10 mm) to 0.010 inches (0.25 mm).
Aperture Wall Angle
The wall angle of the apertures in the stencil affects the release of solder paste during the printing process. A slightly tapered wall angle, typically between 1° and 5°, helps to ensure clean paste release and prevents paste from sticking to the stencil. Laser-SMT-Stencils offer excellent control over wall angle, ensuring consistent paste release across the entire stencil.
Fiducial and Alignment Marks
Fiducial and alignment marks are essential for ensuring proper stencil-to-PCB alignment during the Solder paste printing process. These marks, typically located in the corners of the stencil and PCB, are used by automated solder paste printers to align the stencil and PCB accurately. Proper placement and design of these marks are crucial for achieving consistent and reliable solder paste deposition.

Stencil Manufacturing Process
The manufacturing process for Laser-SMT-Stencils involves several key steps:
- Design and Data Preparation: The stencil design is created using CAD software, based on the PCB Layout and component specifications. The design data is then prepared for the laser cutting process.
- Material Selection: High-quality stainless steel, typically grade 304 or 316, is selected for its durability, corrosion resistance, and suitability for laser cutting.
- Laser Cutting: The stencil design is transferred to the stainless steel sheet using a high-precision laser cutting machine. The laser cuts the apertures and features according to the design data, ensuring tight tolerances and clean, burr-free edges.
- Cleaning and Inspection: After laser cutting, the stencil is cleaned to remove any debris or contaminants. The stencil is then inspected using high-resolution cameras or microscopes to ensure that all apertures and features meet the required specifications.
- Packaging and Shipping: The inspected stencil is packaged in a protective container to prevent damage during shipping. The stencil is then shipped to the customer, ready for use in their SMT assembly process.

Stencil Maintenance and Care
Proper maintenance and care of Laser-SMT-Stencils are essential for ensuring consistent solder paste deposition and long stencil life. Some key maintenance and care practices include:
Regular Cleaning
Stencils should be cleaned regularly to remove solder paste residue and prevent the buildup of contaminants. Cleaning can be performed using manual methods, such as wiping with a solvent-soaked cloth, or automated stencil cleaning machines.
Inspection and Repair
Stencils should be inspected periodically for signs of wear, damage, or aperture blockage. Any defects or issues should be addressed promptly to prevent further damage and ensure consistent solder paste deposition. Minor repairs, such as aperture re-cutting or de-burring, can often be performed on-site.
Proper Storage
When not in use, stencils should be stored in a clean, dry environment to prevent corrosion and damage. Stencils should be stored flat or hung vertically to prevent warping or deformation.
Frequently Asked Questions (FAQ)
- Q: What are the advantages of Laser-SMT-Stencils over other stencil types?
A: Laser-SMT-Stencils offer several advantages, including high precision and accuracy, clean and burr-free apertures, rapid prototyping and quick turnaround times, and excellent durability and long life. - Q: How thick should an SMT stencil be?
A: The optimal stencil thickness depends on factors such as component size, pin pitch, and the desired solder joint profile. Common stencil thicknesses range from 0.004 inches (0.10 mm) to 0.010 inches (0.25 mm). - Q: How often should SMT stencils be cleaned?
A: The frequency of stencil cleaning depends on factors such as production volume, solder paste type, and environmental conditions. As a general guideline, stencils should be cleaned every 4-8 hours of continuous use or between production shifts. - Q: What materials are used to make Laser-SMT-Stencils?
A: Laser-SMT-Stencils are typically made from high-quality stainless steel, such as grade 304 or 316, which offers excellent durability, corrosion resistance, and suitability for laser cutting. - Q: How long does it take to manufacture a Laser-SMT-Stencil?
A: Laser-SMT-Stencils can typically be produced within 24-48 hours, depending on the complexity of the design and the manufacturer’s workload. This quick turnaround time makes them ideal for rapid prototyping and short production runs.
Conclusion
Laser-SMT-Stencils have become an essential tool in modern electronics manufacturing, offering numerous advantages over other stencil types. Their high precision, clean apertures, rapid prototyping capabilities, and long life make them the preferred choice for many manufacturers. By understanding the design considerations, manufacturing process, and maintenance requirements of Laser-SMT-Stencils, manufacturers can ensure consistent, high-quality solder paste deposition and optimize their SMT assembly processes.
| Stencil Type | Advantages | Disadvantages |
|---|---|---|
| Laser-cut | High precision and accuracy, clean and burr-free apertures, rapid prototyping, long life | Higher initial cost compared to chemical-etched stencils |
| Chemical-etched | Lower cost for larger apertures and lower-volume production | Less precise than laser-cut stencils, potential for rougher aperture edges |
| Electroformed | Excellent detail and accuracy | Higher cost than laser-cut and chemical-etched stencils |
As the electronics industry continues to evolve, with smaller components and more complex designs, the importance of high-quality SMT stencils will only continue to grow. By embracing the latest technologies, such as Laser-SMT-Stencils, manufacturers can stay ahead of the curve and deliver the innovative, reliable products that customers demand.
No responses yet