Introduction to Double-sided SMT
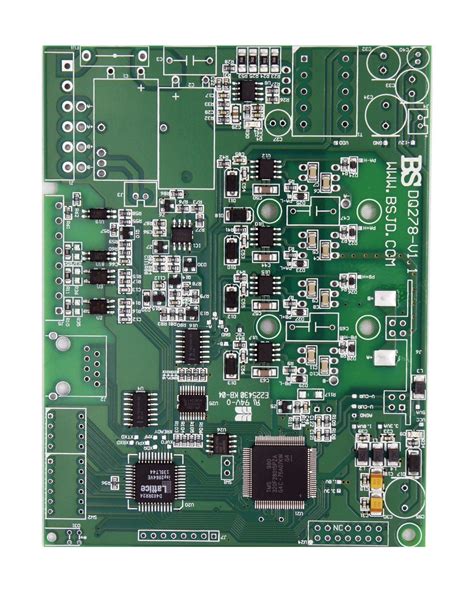
Double-sided Surface Mount Technology (SMT) assembly is a process that enables the placement of electronic components on both sides of a printed circuit board (PCB). This advanced manufacturing technique has revolutionized the electronics industry by allowing for the creation of more compact, sophisticated, and efficient electronic devices. In this comprehensive article, we will delve into the intricacies of double-sided SMT assembly, exploring its benefits, challenges, and the step-by-step process involved in creating a double-sided PCB.
What is SMT Assembly?
Surface Mount Technology (SMT) is a method of assembling electronic components directly onto the surface of a printed circuit board. Unlike through-hole technology, which involves inserting component leads through holes drilled in the PCB, SMT components are placed on designated pads or lands on the PCB surface. This technology has gained immense popularity due to its numerous advantages, including:
- Increased component density
- Reduced PCB size and weight
- Improved electrical performance
- Enhanced manufacturing efficiency
- Lower production costs
The Need for Double-Sided SMT
As electronic devices become more complex and feature-rich, the demand for higher component density and more compact PCBs has grown exponentially. Single-sided SMT assembly, while effective, has its limitations in terms of the number of components that can be accommodated on a single side of the PCB. Double-sided SMT assembly addresses this challenge by utilizing both sides of the PCB, effectively doubling the available surface area for component placement.
The Double-Sided SMT Assembly Process
The double-sided SMT assembly process involves several critical steps, each of which must be executed with precision and care to ensure the quality and reliability of the final product. Let’s take a closer look at each stage of the process.
Step 1: PCB Design and Preparation
The first step in double-sided SMT assembly is designing the PCB layout. This involves creating a detailed schematic of the circuit and determining the optimal placement of components on both sides of the board. The design must take into account various factors, such as:
- Component size and shape
- Pad dimensions and spacing
- Routing of traces and vias
- Thermal considerations
- Manufacturing constraints
Once the PCB design is finalized, the bare board is fabricated and prepared for the assembly process. This typically involves applying a solder mask to protect the copper traces and a silkscreen to label components and provide visual references.
Step 2: Solder Paste Application
The next step is to apply solder paste to the pads on both sides of the PCB. Solder paste is a mixture of tiny solder particles suspended in a flux medium. The most common method for applying solder paste is using a stencil, which is a thin metal sheet with apertures that correspond to the pad locations on the PCB.
The stencil is aligned with the PCB, and solder paste is spread across the surface using a squeegee. As the squeegee moves across the stencil, it forces the solder paste through the apertures and onto the pads. The thickness of the stencil and the size of the apertures determine the amount of solder paste deposited on each pad.
Step 3: Component Placement
After the solder paste has been applied, the electronic components are placed on the pads. This is typically done using a pick-and-place machine, which uses a vacuum nozzle or gripper to pick up components from a feeder and place them on the PCB with high precision.
In double-sided SMT assembly, the placement process is divided into two stages:
- Bottom side component placement: Components are placed on the bottom side of the PCB first. The board is then flipped over, and the process is repeated for the top side.
- Top side component placement: Components are placed on the top side of the PCB. This stage requires careful planning to ensure that the components on the bottom side are not dislodged or damaged during the placement of top side components.
Step 4: Reflow Soldering
Once all the components have been placed on both sides of the PCB, the board undergoes reflow soldering. In this process, the PCB is passed through a reflow oven, which applies a controlled heat profile to melt the solder paste and create a permanent bond between the components and the pads.
The reflow soldering process typically involves four stages:
- Preheat: The PCB is gradually heated to a temperature just below the melting point of the solder paste. This stage activates the flux and prepares the components and pads for soldering.
- Soak: The temperature is maintained for a specific duration to ensure that all components and pads reach a uniform temperature.
- Reflow: The temperature is rapidly increased to a peak value, typically above the melting point of the solder. This causes the solder particles to melt and form a strong bond with the components and pads.
- Cooling: The PCB is cooled gradually to allow the solder joints to solidify and prevent thermal shock to the components.
Step 5: Inspection and Testing
After the reflow soldering process, the assembled PCB undergoes a thorough inspection to ensure the quality and integrity of the solder joints and component placement. This is typically done using automated optical inspection (AOI) systems, which use high-resolution cameras and advanced image processing algorithms to detect defects such as:
- Bridging: Unintended connection between two or more pads due to excess solder.
- Tombstoning: A component standing up on one end due to uneven heating or pad design.
- Insufficient solder: A weak or incomplete solder joint due to insufficient solder paste.
- Misalignment: Components placed incorrectly or not centered on the pads.
In addition to visual inspection, the assembled PCB may also undergo electrical testing to verify its functionality and performance. This can include in-circuit testing (ICT), flying probe testing, or functional testing, depending on the complexity and requirements of the board.

Challenges in Double-Sided SMT Assembly
While double-sided SMT assembly offers numerous benefits, it also presents some unique challenges that must be addressed to ensure a successful outcome. Some of the key challenges include:
Component Clearance
Placing components on both sides of the PCB requires careful planning to ensure that there is sufficient clearance between the components on opposite sides. This is particularly important for taller components, such as capacitors or connectors, which may interfere with components on the other side of the board.
To mitigate this issue, designers must carefully select component heights and locations to minimize interference. In some cases, it may be necessary to use specialized components, such as low-profile or reverse-mounted parts, to achieve the desired clearance.
Thermal Management
Double-sided SMT assembly can present challenges in terms of thermal management, as the heat generated by components on one side of the board can affect the components on the other side. This is particularly important during the reflow soldering process, where uneven heating can lead to defects such as warping, delamination, or component damage.
To address this challenge, designers must carefully balance the thermal loads on both sides of the board and select components with appropriate thermal characteristics. In some cases, it may be necessary to use thermal vias or heat sinks to dissipate excess heat and ensure even temperature distribution.
Tooling and Fixturing
Double-sided SMT assembly often requires specialized tooling and fixturing to support the PCB during the placement and soldering processes. This is particularly important for the bottom side components, which must be held securely in place while the top side components are being placed and soldered.
Designers must work closely with manufacturing partners to develop custom tooling and fixturing solutions that can accommodate the specific requirements of each double-sided PCB design. This may involve the use of specialized jigs, clamps, or vacuum fixtures to ensure precise alignment and support throughout the assembly process.

Benefits of Double-Sided SMT Assembly
Despite the challenges, double-sided SMT assembly offers a range of compelling benefits that make it an attractive option for many electronic products. Some of the key advantages include:
Increased Component Density
By utilizing both sides of the PCB, double-sided SMT assembly enables designers to pack more components into a smaller space. This increased component density can lead to more compact and lightweight products, which are particularly important in applications such as mobile devices, wearables, and aerospace systems.
Improved Electrical Performance
Double-sided SMT assembly can also offer improved electrical performance compared to single-sided designs. By placing components on both sides of the board, designers can minimize the length of traces and reduce the overall impedance of the circuit. This can lead to faster signal propagation, reduced noise and interference, and better overall system performance.
Cost Savings
While double-sided SMT assembly may require additional tooling and processing steps compared to single-sided designs, it can actually lead to significant cost savings in the long run. By reducing the overall size of the PCB and increasing component density, double-sided assembly can help to minimize material costs, simplify packaging requirements, and reduce the overall footprint of the final product.
In addition, the increased automation and efficiency of the double-sided SMT assembly process can help to reduce labor costs and improve production throughput, further contributing to overall cost savings.

FAQs
- Q: What is the difference between single-sided and double-sided SMT assembly?
A: Single-sided SMT assembly involves placing components on only one side of the PCB, while double-sided assembly places components on both sides of the board. Double-sided assembly offers increased component density and improved electrical performance, but requires additional processing steps and tooling compared to single-sided designs. - Q: Can all components be used in double-sided SMT assembly?
A: Not all components are suitable for double-sided SMT assembly. Some components, such as through-hole parts or tall components, may interfere with components on the opposite side of the board. Designers must carefully select components and plan their placement to ensure adequate clearance and compatibility with double-sided assembly. - Q: How does the reflow soldering process differ for double-sided SMT assembly?
A: In double-sided SMT assembly, the reflow soldering process must be carefully controlled to ensure even heating and prevent damage to components on both sides of the board. This may require specialized equipment, such as dual-lane reflow ovens, or multiple passes through the reflow oven to achieve the desired solder joint quality. - Q: What are some common defects in double-sided SMT assembly?
A: Common defects in double-sided SMT assembly include bridging (unintended connections between pads), tombstoning (components standing up on one end), insufficient solder, and component misalignment. These defects can be caused by issues such as uneven heating, incorrect solder paste application, or inadequate component placement accuracy. - Q: How can designers ensure the success of a double-sided SMT assembly project?
A: To ensure the success of a double-sided SMT assembly project, designers should work closely with their manufacturing partners to develop a comprehensive design and assembly plan. This may involve careful component selection, detailed PCB layout and routing, thermal analysis, and the development of custom tooling and fixturing solutions. Regular communication and collaboration throughout the design and assembly process can help to identify and mitigate potential issues early on, leading to a more successful outcome.
Conclusion
Double-sided SMT assembly is a powerful technique that enables the creation of more compact, high-performance electronic products. By placing components on both sides of the PCB, designers can increase component density, improve electrical performance, and reduce overall system costs.
However, double-sided assembly also presents unique challenges, such as component clearance, thermal management, and tooling requirements. To overcome these challenges and ensure a successful outcome, designers must work closely with their manufacturing partners to develop a comprehensive design and assembly plan that addresses the specific requirements of each project.
As electronic products continue to evolve and become more complex, double-sided SMT assembly will play an increasingly important role in enabling the next generation of innovative and efficient devices. By understanding the intricacies of this process and collaborating effectively with industry partners, designers can unlock the full potential of double-sided SMT assembly and create products that push the boundaries of performance and functionality.
No responses yet