What is PCB Fabrication?
PCB fabrication is the process of designing and manufacturing printed circuit boards (PCBs). PCBs are the foundation of modern electronics, providing a platform for components to be mounted and connected. The PCB fabrication process involves several steps, including:
- Design: Creating the schematic and layout of the PCB using specialized software
- Printing: Transferring the design onto the copper-clad board
- Etching: Removing unwanted copper from the board, leaving only the desired circuit pattern
- Drilling: Creating holes for through-hole components and vias
- Plating: Applying a thin layer of metal (usually tin-lead or gold) to protect the copper and improve solderability
- Silkscreen: Adding text and symbols to the board for identification and assembly
- Solder Mask: Applying a protective coating to the board, leaving only the pads and holes exposed
- Cutting: Separating individual boards from the panel
PCB Fabrication Techniques
There are several techniques used in PCB fabrication, each with its own advantages and disadvantages. The most common techniques are:
| Technique | Advantages | Disadvantages |
|---|---|---|
| Through-Hole Technology (THT) | – Strong mechanical connections – Easy to solder and inspect |
– Larger size and weight – Higher cost – Slower assembly |
| Surface Mount Technology (SMT) | – Smaller size and weight – Lower cost – Faster assembly |
– Weaker mechanical connections – More difficult to solder and inspect |
| Mixed Technology | – Combines advantages of THT and SMT – Allows for more complex designs |
– Higher cost – More complex assembly process |
Circuit Board Repair Kit Tape and Pad
When a PCB is damaged, it can often be repaired using a circuit board repair kit. These kits typically include:
- Copper tape: Used to bridge broken traces and pads
- Conductive epoxy: Used to attach components and repair damaged pads
- Solder: Used to attach components and create electrical connections
- Flux: Used to clean and prepare surfaces for soldering
- Solder wick: Used to remove excess solder
- Tweezers: Used to handle small components and materials
- Magnifying glass: Used to inspect the board and components
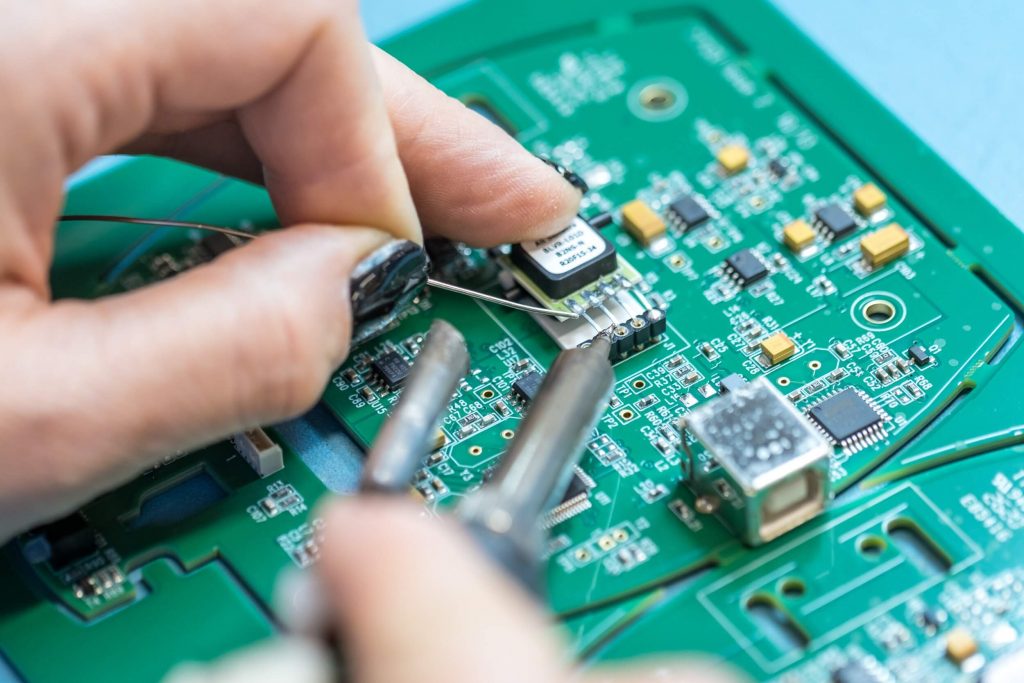
Using a Circuit Board Repair Kit
To use a circuit board repair kit, follow these steps:
- Clean the damaged area: Use isopropyl alcohol and a soft brush to remove any dirt, debris, or oxidation from the damaged area.
- Assess the damage: Use a magnifying glass to inspect the extent of the damage and determine the best repair method.
- Repair broken traces: If a trace is broken, use copper tape to bridge the gap. Cut a piece of tape slightly longer than the break and press it firmly onto the board.
- Repair damaged pads: If a pad is damaged, use conductive epoxy to build up the pad and create a new surface for soldering. Apply the epoxy carefully and allow it to cure according to the manufacturer’s instructions.
- Replace damaged components: If a component is damaged beyond repair, carefully remove it using a soldering iron and solder wick. Clean the pads thoroughly and attach a new component using solder and flux.
- Inspect the repair: Use a magnifying glass to inspect the repaired area for any defects or short circuits. Test the board to ensure proper functionality.

PCB Repair Techniques
In addition to using a repair kit, there are several other techniques that can be used to repair damaged PCBs:
Jumper Wires
Jumper wires can be used to bypass damaged traces or connect components directly. To use a jumper wire:
- Strip the ends of the wire and tin them with solder
- Carefully solder one end of the wire to a pad or component lead
- Route the wire to the desired location and solder the other end
- Use insulation, such as heat shrink tubing, to protect the wire and prevent short circuits
Solder Bridges
Solder bridges can be used to repair short circuits or connect adjacent pads. To create a solder bridge:
- Clean the pads thoroughly with isopropyl alcohol and a soft brush
- Apply a small amount of solder to one pad
- Quickly drag the soldering iron to the adjacent pad, creating a thin bridge of solder
- Inspect the bridge for any defects or excess solder
Trace Repair Pens
Trace repair pens are specialized tools that can be used to draw new traces on a PCB. These pens contain conductive ink that can be used to create electrical connections. To use a trace repair pen:
- Clean the board thoroughly with isopropyl alcohol
- Carefully draw the new trace, following the original circuit pattern
- Allow the ink to dry completely before handling the board
- Inspect the new trace for any defects or breaks

FAQ
Can all PCBs be repaired?
Not all PCBs can be repaired, depending on the extent and location of the damage. Some factors that may make a PCB unrepairable include:
- Severe physical damage, such as cracks or breaks in the board
- Damage to multiple layers or buried traces
- Damage to critical components, such as microprocessors or ASICs
In these cases, it may be more cost-effective to replace the entire board rather than attempt a repair.
How long do PCB repairs last?
The longevity of a PCB repair depends on several factors, including:
- The quality of the repair materials and techniques used
- The environmental conditions the board is exposed to (temperature, humidity, vibration, etc.)
- The type and severity of the original damage
In general, a well-executed repair can last for several years or even the lifetime of the product. However, it is important to monitor the repaired area for any signs of degradation or failure.
Can I repair a PCB without a repair kit?
While it is possible to repair a PCB without a dedicated repair kit, it is not recommended for beginners or those without experience in electronics. Attempting a repair without the proper tools and materials can result in further damage to the board or components.
If you do not have access to a repair kit, it is best to consult with a professional electronics repair service or purchase the necessary materials from a reputable supplier.
How much does it cost to repair a PCB?
The cost of repairing a PCB can vary widely depending on the extent of the damage, the complexity of the board, and the cost of replacement components. In general, simple repairs, such as replacing a single component or repairing a broken trace, can cost anywhere from a few dollars to a few hundred dollars.
More complex repairs, such as those involving multiple layers or critical components, can cost several thousand dollars or more. In some cases, it may be more cost-effective to replace the entire board rather than attempt a repair.
Can I prevent PCB damage?
While it is not always possible to prevent PCB damage, there are several steps you can take to minimize the risk:
- Handle boards carefully and avoid rough handling or dropping
- Use proper storage and packaging materials to protect boards during transport and storage
- Avoid exposing boards to extreme temperatures, humidity, or other environmental hazards
- Use appropriate static protection measures when handling sensitive components
- Follow proper installation and maintenance procedures for the specific product or application
By taking these precautions, you can help extend the life of your PCBs and reduce the need for costly repairs or replacements.
Conclusion
PCB fabrication is a complex process that requires specialized knowledge, tools, and techniques. When a PCB is damaged, it can often be repaired using a circuit board repair kit or other specialized tools and materials.
By understanding the different repair techniques and best practices, you can successfully repair damaged PCBs and extend the life of your electronic products. However, it is important to carefully assess the extent of the damage and consider the cost and feasibility of repair before attempting any work.
If you are unsure about your ability to repair a PCB, it is always best to consult with a professional electronics repair service or manufacturer for guidance and assistance.
No responses yet