Introduction to PCBA Visualizer
PCBA Visualizer is a powerful tool designed to provide engineers, designers, and manufacturers with a comprehensive view of their printed circuit board assemblies (PCBAs). This user guide will walk you through the features and functionality of the PCBA Visualizer, focusing on the CPL Editor component.
What is PCBA Visualizer?
PCBA Visualizer is a software application that allows users to visualize, analyze, and optimize their PCBAs. It provides a 3D representation of the board, enabling users to inspect components, traces, and layers in detail. The tool also offers features such as design rule checking (DRC), bill of materials (BOM) management, and manufacturing file generation.
Benefits of Using PCBA Visualizer
- Improved design accuracy and quality
- Reduced time-to-market
- Enhanced collaboration between design and manufacturing teams
- Minimized manufacturing costs and errors
- Increased product reliability and performance
Getting Started with PCBA Visualizer
System Requirements
To run PCBA Visualizer effectively, your system should meet the following minimum requirements:
| Component | Minimum Requirement |
|---|---|
| Operating System | Windows 7, 8, 10, or 11 |
| Processor | Intel Core i5 or equivalent |
| RAM | 8 GB |
| Graphics Card | NVIDIA GeForce GTX 1050 or equivalent |
| Storage | 500 GB HDD or 256 GB SSD |
Installation Process
- Download the PCBA Visualizer installer from the official website.
- Double-click the installer file to begin the installation process.
- Follow the on-screen instructions to complete the installation.
- Launch PCBA Visualizer from the desktop shortcut or the Start menu.

Using the CPL Editor
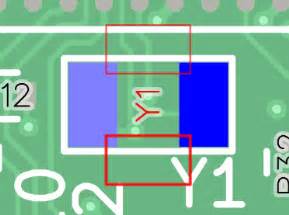
The CPL Editor is a key component of PCBA Visualizer, allowing users to create, edit, and manage component placement lists (CPLs). A CPL is a file that contains information about the components used in a PCBA, including their reference designators, package types, and placement coordinates.
Creating a New CPL
To create a new CPL in PCBA Visualizer:
- Click on the “File” menu and select “New CPL.”
- Choose the board template or import an existing board design.
- Enter a name for the new CPL and click “Create.”
Editing Component Properties
Once you have created a CPL, you can edit the properties of individual components:
- Double-click on a component in the 3D view or the component list.
- Modify the component’s properties, such as reference designator, package type, or placement coordinates.
- Click “Apply” to save the changes.
Importing and Exporting CPLs
PCBA Visualizer supports importing and exporting CPLs in various file formats, including:
- CSV (Comma-Separated Values)
- XML (eXtensible Markup Language)
- IPC-2581 (IPC-Connects)
To import a CPL:
- Click on the “File” menu and select “Import CPL.”
- Choose the file format and locate the CPL file on your system.
- Click “Open” to import the CPL into PCBA Visualizer.
To export a CPL:
- Click on the “File” menu and select “Export CPL.”
- Choose the desired file format and specify a location to save the exported file.
- Click “Save” to export the CPL.

Advanced Features of PCBA Visualizer
Design Rule Checking (DRC)
PCBA Visualizer includes a built-in design rule checking (DRC) tool that helps users identify potential issues in their designs. The DRC tool checks for various design rule violations, such as:
- Minimum clearance between components
- Minimum trace width and spacing
- Copper pour and thermal relief settings
- Silkscreen and solder mask clearances
To run a DRC:
- Click on the “Tools” menu and select “Design Rule Check.”
- Configure the DRC settings based on your design requirements.
- Click “Run DRC” to start the checking process.
- Review the DRC results and address any violations found.
Bill of Materials (BOM) Management
PCBA Visualizer offers a comprehensive BOM management feature that allows users to generate, edit, and export BOMs for their designs. The BOM contains a list of all components used in the PCBA, along with their quantities, part numbers, and other relevant information.
To generate a BOM:
- Click on the “Tools” menu and select “Generate BOM.”
- Specify the BOM template and output format.
- Click “Generate” to create the BOM.
To edit a BOM:
- Double-click on the BOM file in the project explorer.
- Modify the component information, quantities, or other fields as needed.
- Click “Save” to update the BOM.
Manufacturing File Generation
PCBA Visualizer can generate various manufacturing files required for PCBA production, such as:
- Gerber files (RS-274X)
- Drill files (Excellon)
- Assembly drawings (PDF or DXF)
- Pick-and-place files (CSV or TXT)
To generate manufacturing files:
- Click on the “File” menu and select “Generate Manufacturing Files.”
- Choose the desired output formats and specify the output directory.
- Click “Generate” to create the manufacturing files.

FAQ
-
Q: Can PCBA Visualizer import designs from other PCB design software?
A: Yes, PCBA Visualizer supports importing designs from popular PCB design software such as Altium Designer, Cadence Allegro, and KiCad. -
Q: Does PCBA Visualizer support multi-layer PCBAs?
A: Yes, PCBA Visualizer can handle multi-layer PCBAs, allowing users to view and analyze individual layers and the overall stack-up. -
Q: Is it possible to customize the DRC rules in PCBA Visualizer?
A: Yes, users can define custom DRC rules based on their specific design requirements and manufacturing capabilities. -
Q: Can multiple users work on the same PCBA project simultaneously?
A: PCBA Visualizer supports collaborative design, allowing multiple users to work on the same project concurrently, with real-time updates and version control. -
Q: Does PCBA Visualizer offer any automation features to streamline the design process?
A: Yes, PCBA Visualizer includes automation features such as auto-routing, component placement optimization, and design rule-driven validation to accelerate the design process and minimize manual effort.
Conclusion
PCBA Visualizer is a comprehensive tool that empowers engineers, designers, and manufacturers to create, analyze, and optimize their PCBA designs efficiently. With its intuitive CPL Editor, advanced features like DRC and BOM management, and support for various file formats, PCBA Visualizer streamlines the design process and enhances collaboration between teams. By following this user guide, you can effectively leverage the capabilities of PCBA Visualizer to improve your PCBA design and manufacturing workflows.
No responses yet