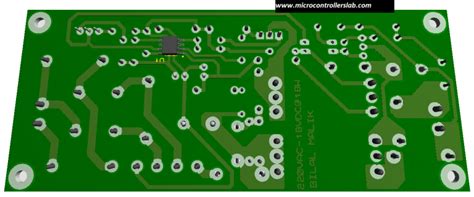
What is AutoDesk Eagle?
AutoDesk Eagle is a powerful electronic design automation (EDA) software that allows users to create schematic diagrams and PCB layouts for electronic circuits. It is widely used by hobbyists, students, and professionals in the electronics industry.
Why Use AutoDesk Eagle for PCB Design?
There are several reasons why AutoDesk Eagle is a popular choice for PCB design:
- User-friendly interface
- Extensive libraries of components
- Powerful routing and placement tools
- Compatibility with a wide range of PCB Manufacturers
- Affordable pricing options
Getting Started with AutoDesk Eagle
Before you can start designing your PCB, you’ll need to download and install AutoDesk Eagle on your computer. Here’s how to get started:
- Visit the AutoDesk website and create an account
- Download the AutoDesk Eagle software (free trial available)
- Install the software on your computer
- Launch AutoDesk Eagle and familiarize yourself with the interface

Understanding the AutoDesk Eagle Interface
The AutoDesk Eagle interface consists of several key components:
| Component | Description |
|---|---|
| Control Panel | Provides access to various tools and settings |
| Schematic Editor | Used to create schematic diagrams of electronic circuits |
| Board Editor | Used to design the physical layout of the PCB |
| Library Editor | Used to create and edit component libraries |
Creating a Schematic Diagram
The first step in creating a PCB is to create a schematic diagram of your electronic circuit. Here’s how to do it in AutoDesk Eagle:
- Open the Schematic Editor
- Add components to your schematic using the Add tool
- Connect the components using the Net tool
- Add labels and values to your components
- Check your schematic for errors using the ERC tool
Designing the PCB Layout
Once you have created your schematic diagram, you can move on to designing the physical layout of your PCB. Here’s how to do it in AutoDesk Eagle:
- Open the Board Editor
- Import your schematic diagram using the Switch to Board tool
- Place your components on the board using the Move tool
- Route the connections between your components using the Route tool
- Add copper pours and vias as needed
- Check your board for errors using the DRC tool
Generating Gerber Files
After you have completed your PCB layout, you’ll need to generate Gerber files to send to a PCB manufacturer. Here’s how to do it in AutoDesk Eagle:
- Open the CAM Processor
- Select the layers you want to include in your Gerber files
- Set the output format to Gerber RS-274X
- Generate your Gerber files
- Review your Gerber files for accuracy
Selecting a PCB Manufacturer
There are many PCB manufacturers to choose from, each with their own capabilities and pricing. Here are some factors to consider when selecting a PCB manufacturer:
- Minimum order quantity
- Lead time
- Pricing
- Materials and finishes available
- Design rules and constraints
Some popular PCB manufacturers include:
- JLCPCB
- PCBWay
- OSH Park
- Seeed Studio
Tips and Tricks for PCB Design
Here are some tips and tricks to help you create better PCBs using AutoDesk Eagle:
- Use a consistent naming convention for your components and nets
- Keep your schematic diagram organized and easy to read
- Use the grid and snap settings to ensure precise placement of components
- Follow the manufacturer’s design rules and constraints
- Use copper pours to improve signal integrity and reduce EMI
- Test your PCB before sending it to production
Frequently Asked Questions (FAQ)
- What is the difference between a schematic diagram and a PCB layout?
- A schematic diagram is a symbolic representation of an electronic circuit, showing how the components are connected. A PCB layout is the physical design of the printed circuit board, showing where the components are placed and how they are connected.
- Can I use AutoDesk Eagle for free?
- AutoDesk offers a free trial of Eagle, which allows you to use the software for a limited time. After the trial period, you’ll need to purchase a license to continue using the software.
- What are Gerber files?
- Gerber files are a standard format used by PCB manufacturers to describe the different layers of a PCB. They contain information about the copper traces, drill holes, and other features of the PCB.
- How long does it take to receive a PCB from a manufacturer?
- The lead time for PCB manufacturing varies depending on the manufacturer and the complexity of the design. Typically, it takes 1-2 weeks to receive a PCB after placing an order.
- Can I use AutoDesk Eagle to design Flexible PCBs?
- Yes, AutoDesk Eagle supports the design of flexible PCBs, although the process is slightly different than designing a rigid PCB. You’ll need to use special layer types and design rules to ensure that your flexible PCB is manufacturable.
Conclusion
Creating your own PCBs using AutoDesk Eagle can be a rewarding and educational experience. By following the steps outlined in this tutorial, you’ll be well on your way to designing and manufacturing your own custom PCBs. Remember to take your time, double-check your work, and don’t be afraid to ask for help if you get stuck. Happy PCB designing!

No responses yet